I get mail.
Sometimes it's angry or bizarre email - and sometimes it's a box.
A couple of days ago I got a package slip in my mail box. See, we've got Alaskan rural mail service - which means that up until a couple of years ago we had to go into Palmer to get our mail, dodging moose and bears and giant mosquitos and whatnot the whole way. Inconvenient to say the least. Two years ago, a bunch of us chipped in and bought one of those big metal birdhouse looking community mail boxes and had it installed. So, now the contract slackers who deliver our mail will put envelopes and magazines and such in our box, but they do not deliver packages. For that we've got to go into town, and stand in line. And you know how I feel about that.
I wasn't expecting a package - so it was a day or two before I got around to it. After the usual twenty minute wait in line, I got my package. It was a box - a heavy box. Something inside rolled oddly, frankly it felt exactly like a bowling ball in a box - or a head. The postal robot looked at me suspiciously as he handed it over. Screw him, I smiled my best "Ahmed the Jackal" you'll be sorry smile, and left him wondering.
Now, what the hell was it?
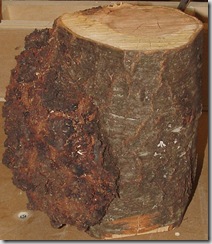
Ah, the return address explained it - South Carolina, my cousin Dona. Inside the box was this:
Yep, that's a log.
Well, a burl actually. As near as I can tell it's a chunk of American Hornbeam (Carpinus caroliniana or possibly virginiana), usually called ironwood or hophornbeam, a common tree in the Carolinas. The wood is dense and heavy and very fragrant.
Well, hell, how about that? It was still green - and I had most of my production work done, so I decided that I was going to take a couple of hours and turn this unexpected bounty.
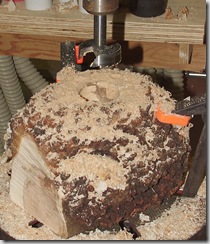
The first step was to bore a hole in what would become the top, in order to mount the lathe chuck. This is done in two steps. First I use a large forstner bit in the drill press to bore a well. Followed by a wing cutter which scribes a 5 inch circle around the well to a depth of about an inch.
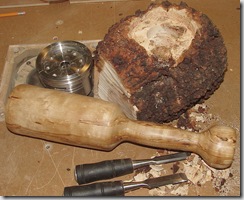
Then the waste between the well and the kerf scribed by the wing cutter has to be removed with chisel and mallet in order to make a solid well for the chuck (that silver cylinder jobber in the upper left of the picture).
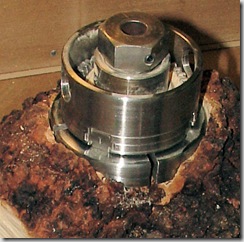
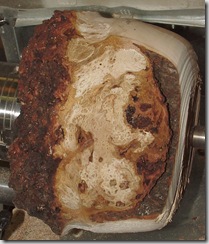
Here's the chuck mounted in the blank. In this picture you can see the jaws expanded to hold this very heavy piece of wood securely. Trust me, you really don't want something like this coming loose when it's spinning at 800rpm.
Next it gets trimmed on the bandsaw into a roughly cylindrical shape and mounted on the lathe...
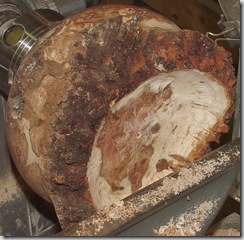
...using gouges and scrapers I carefully begin to shape the wood.
You can see that it's going to be a very interesting piece.
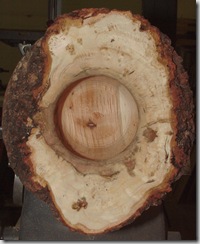
A little more shaping and then I cut a mortise in the bottom, so that I can reverse the bowl on the chuck. Not many turners use this particular technique, they prefer the bottom of the piece to be smooth. Me, I like the well in the bottom, it gives me a place to sign my name, and I think it adds an interesting feature. That orange line you see in the picture is where I'll make the mortising cut.
Once the base mortise is cut, I reverse the piece on the chuck and begin the hollowing process. Up until this point I only have a vague notion of what the final shape will be. I want to leave some of the spectacular natural edging and show off the grain. I let the wood guide the final design.
Once I see the incredible figure and burl grain, I decide to make a natural-edged flared top hollowform.
This is a difficult shape to pull off, and not for beginners.
The final shape begins to emerge from the burl...
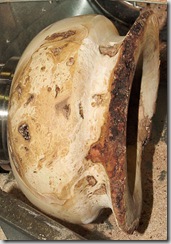
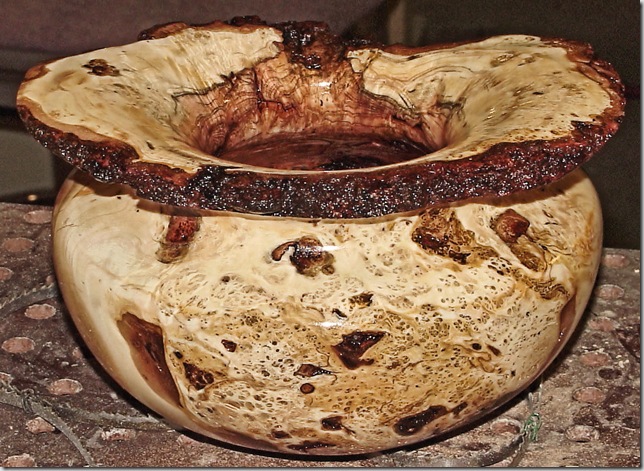
And after four hours of very careful work, this is what I ended up with:
It's about 7" in diameter, and about 5" tall. It's incredibly heavy. I finished it in simple Tung oil.
Thanks, Dona.
Send more. A lot more.


That's impressive, made more so by being able to follow the steps you took to make it. Thanks for the peek into how you make your amazing creations!
ReplyDeleteWow! All that from a log with a tumor. Cool beans!
ReplyDeleteIt's not a tuuuma...
ReplyDeleteNathan, get with the program. It's not a tumor. It's a super-secret embedded virus from the enemies of the Grey's who are intent on destroying the tool of the Grey's.
ReplyDeleteThat's really lovely! Nice work. :)
ReplyDeleteWow, that's cool! Like Vince said, thanks for the step by step. That was as interesting as the final piece. :)
ReplyDeleteThat was really cool! I loved seeing the object develop from the thing!
ReplyDeleteOr... err... something like that.
muscle-wood (aka ironwood), are you kidding. What, do you own stock in a carbide tool company? Were you the recipient of the carbide bits the locals were taking from our local factory (that makes them) (local police sting, $6000 worth of tools recovered immediately, more to come later)? I'm sure you've got the sharpening thing down, but seriously. You know, hard maple is a little less wearing on those tools.
ReplyDeleteVary cool peace brother, that is going to look great in the middle of my dinning room table.
ReplyDeleteGF just looked at this and adds a "Wow".
ReplyDeleteIsn't it amazing that something that is flawed can be turned into something so beautiful and interesting? A tree without flaws would never have given you that.
ReplyDeleteKudos to your cousin for recognizing the possibilities -- both for the tree and for you.
Thanks for the comments, folks. I was pretty tickled with this one too.
ReplyDeleteSteve, surprisingly ironwood turns extremely easy. I do use carbide cutters for hollowing, but my chisels, gouges, and scrapers are all HSS (high speed steel - a form of high carbon steel but not actually considered carbide). Most of my lathe tools are Robert Sorby signature tools, made from Sheffield steel, in England.
Strangely, harder woods such as ironwood turn much easier than soft woods.
show off show off show off. Oh and Cousin Dona Rocks. Nice one man.
ReplyDeleteOooh, pretty. And I have to agree with Nathan -- it did look like a hunk of wood with a tumor. As someone who enjoys seeing *how* things are made more than the final product -- the "turn by turn" description with pictures was fascinating. The kind of thing that you make look easy but has to take a lot of skill.
ReplyDeleteYou do really good work! And it was neat to follow the steps involved in creating something so beautiful.
ReplyDeleteWow! Just Wow!
ReplyDelete